
How to teach yourself gongbi painting with zero foundation?
By Fei Gao on Dec 19, 2023
First of all, don’t have any psychological burden when learning gongbi painting from scratch. “Everything is difficult at the beginning, difficult in the middle, and difficult at the end.” So it is difficult. Since you have decided to learn, don’t be afraid of difficulties. Secondly, I think it is very necessary to find a good teacher. Nowadays, there are many kinds of painting books on the street, but they are really mixed. Many of them claim to be "Learn XXX in 100 days" or "Teach yourself XXX without a teacher". Most of them are unreliable. If you don't have a teacher's guidance, it's easy to get stuck in these books that appeal to "short, flat and quick". According to my teacher, the most basic level of Linhua is Yu Fei'an. This is not to say that Yu is not good, but because there are only a handful of Chinese painting painters who can truly be called "excellent". A giant of modern fine brushwork, unparalleled. Therefore, it is necessary to give yourself a high platform at the beginning.
The most important thing in gongbi painting is lines and rendering. Lines are the bones and the foundation. Without lines that have both form and spirit, and strong skills, no matter how gorgeous the rendering is, it can make up for the lack of effort in the lines, so practicing drawing lines is necessary and long-term. Kung Fu
If a worker wants to do his job well, he must first sharpen his tools
Materials needed for meticulous painting: rice paper: cooked rice paper, half-cooked rice paper, or skinned xuan rice paper. Cooked Xuan can be used to draw fine brushwork and color directly. It’s best to use medium-rare to practice drawing lines, as dyeing can easily smudge. Pi Xuan can be dyed, but you don’t need to dye it often, so it’s better to use it to practice drawing lines. As for Chanyi Xuan and so on, that is not our turn now.
Brush: A drawing pen, be sure to choose a flexible one. Not too long or too short, just moderate. In fact, it still depends on your hand preference. Two dye pens, one dipped in paint and one clear water pen. If you need to dye many colors, use two dyeing pens for one color.
【2】Environmental preparation before painting
Our teacher said that when painting meticulously, one must be in a calm mood and paint in an environment with bright and clean windows. The screen will be clean. This is a kind of respect that should be paid to meticulous painting, and it is also a quality that must be developed. So our studio is pretty clean. . . .
【3】Oh! teacher! What should I do if I have zero basic knowledge?
Everyone starts from scratch, but some start earlier and some later. Many masters in history took it step by step, even starting to learn painting when they were middle-aged. If you are starting from scratch, remember two things
【Hard work! 】This is no longer a category of hard work. Only hard work, beyond the hard work of ordinary people, can we catch up with those who started training early. On your hard road, you have to endure loneliness and external interference. Saonian, it's up to you. The reason why I like Wen Zhengming is that besides his paintings that really impress me, he himself is a very hard-working master. Wen Zhengming was a contemporary of Tang Yin, and Tang Yin was a very talented painter and quite smart. But in the end, I lingered in the land of fireworks [although I left a lot of good things behind], but Wen Zhengming's diligence and hard work moved me even more. He is still writing at the age of 80, which is really a role model for us.
【think! 】Once you start self-study, it means that you lack the teacher’s guidance than others. Many times, the teacher’s guidance is very important. But if you study this course by yourself, many times you won’t be able to get advice from others, so think more about it!
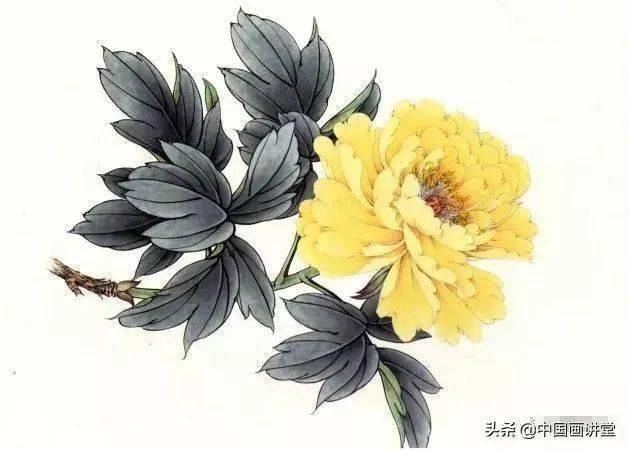
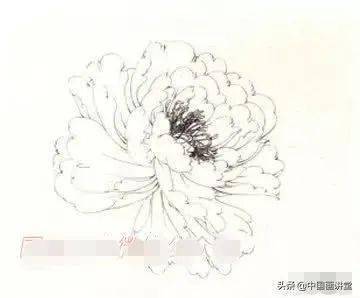
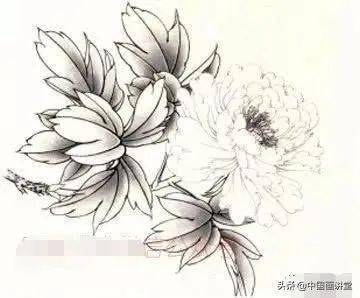
Steps for coloring yellow peonies in fine brushwork!
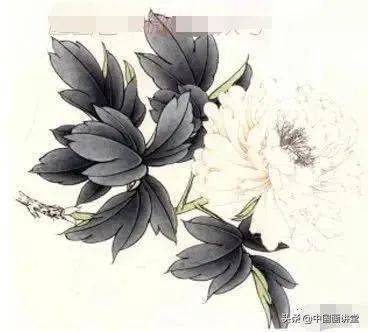
Step 1: Use light ink to outline the peony petals, and use heavy ink to outline the stamens and flower chamber.
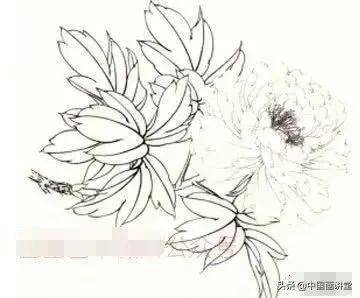
Step 2: Use heavy ink to outline the peony leaves.

Step 3: Use heavy ink to outline the remaining peony leaves, stems and peony branches.
Step 4: Use light ink to dye the peony leaves.
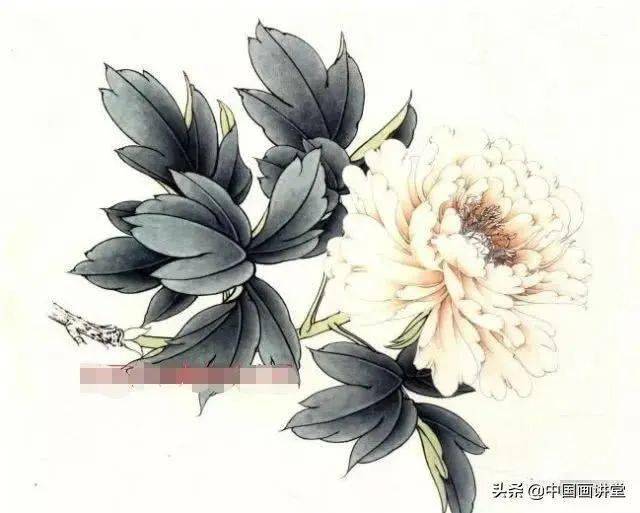
Step 5: Use cyanine to dye the peony leaves.
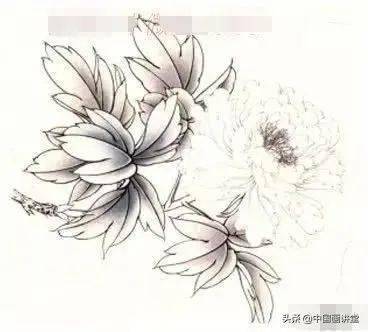
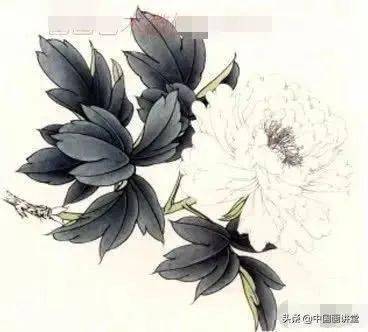
Step 6: Use cyan to dye the remaining peony leaves separately, and use ocher green to cover-dye the peony leaves on the opposite side.
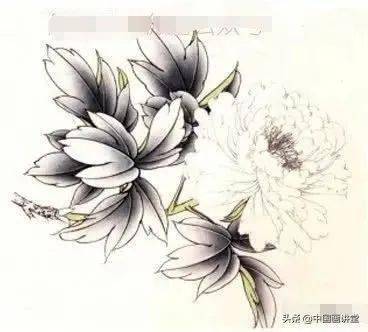
Step 7: Use Garcinia + Cyanine to bring out the green color of the peony leaves below.
Step 8: Use ocher + ink to create an ocher color and dye the peony petals.
Step 9: Use ocher ink to separate and dye the peony petals.
Step 10: Use a yellow mask to dye the front of the peony petals.
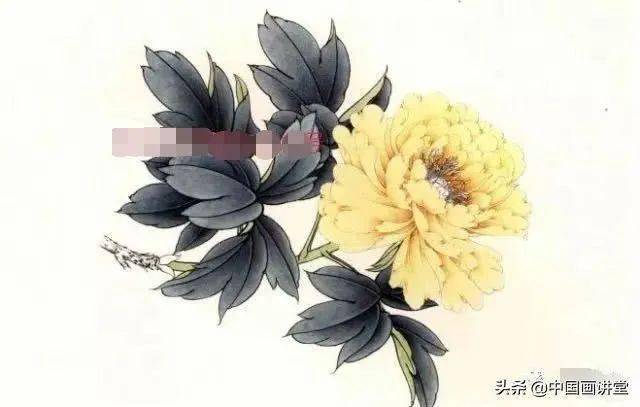
Step 11: Use a yellow mask to dye the front of the peony petals to make them brighter and add a sense of depth.
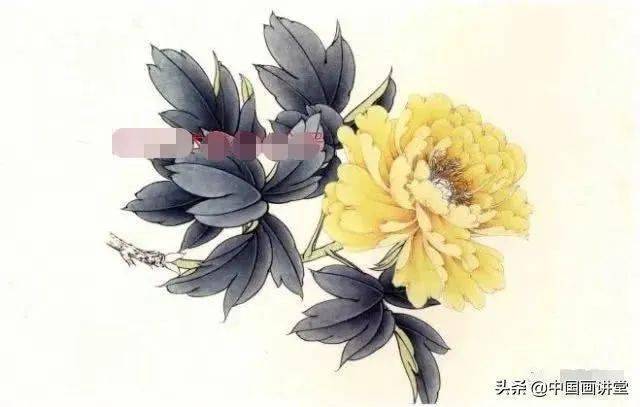
Step 12: Dye the flower room structure with rouge color and cover with ocher color.
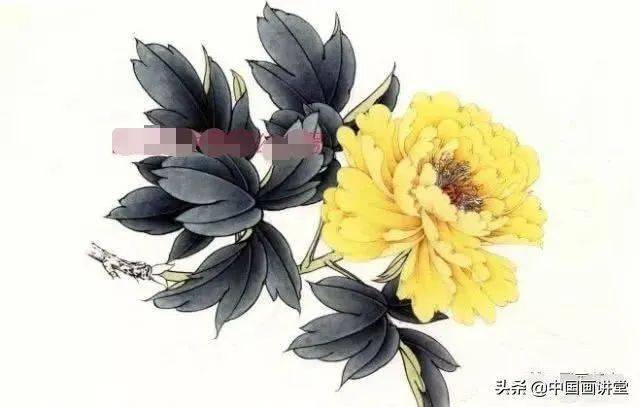
Step 13: Use a yellow mask to dye the stamens, use white vermicelli to draw filaments, use an ocher mask to dye the peony branches, and use heavy ink to outline the small leaf veins.